
Before You Begin
Review the basics of effective wood preparation, finishing & care.

Before You Begin
Review the basics of effective wood preparation, finishing & care.
Choosing Wood For Your Project
Where to Begin?
Look around your home. The floor may be oak or maple; the baseboard and window sills may be clear-finished pine, poplar or cherry. Kitchen cabinets may be solid or laminated, from knotty pine, oak, maple, or cherry. With so many types of wood available, it’s important to learn how to recognize and evaluate basic types of woods to recognize their strengths and weaknesses.
For a quick primer on how various types of wood compare to each other, check out this handy wood species chart.
How do I know what type of wood to use?
Before making your purchase, think about how you intend to use the wood. When choosing the actual piece of wood, check for any twists or warping. Look for splits at the ends of the board and surface defects like knots. Look for machine marks, insect holes, dents, and shipping scars.
Will these defects affect how you intend to use the wood? Compare the different types of grain patterns. Try to match grain patterns in boards that will be used next to one another, since differences will become more pronounced once you brush on a coat of stain.
Finally, once you’ve made your decision, be sure to measure the wood before you buy it.
Workspace and Supplies
Expert Tips
Before starting any wood finishing project, it’s important to have a proper workspace and supplies. When creating the ideal area, keep the following in mind:
- The workstation must have adequate light.
- Always work in a well-ventilated area.
- The workspace should be dry and warm. If the area is cool or damp, it may affect the dry times indicated on the labels.
There are a number of items frequently used in wood finishing projects. This list does not include all the supplies needed, but what is most commonly used. Always consult the label of the Minwax® products you are using to see if special application tools are required.
- Rags
- Brushes
- Sandpaper
- Paper Towels
- Stir Sticks
- Safety Glasses
- Rubber Gloves
- Drop Cloths or Newspapers
For best results and your own safety, always read and follow all label warnings and instructions carefully.
Choosing the Proper Applicator
Wood finishing products may be applied with clean rags, brushes and other applicators. For best results when using a brush, make sure it is a high-quality one. Why?
- A high-quality brush carries more stain or finish
- Your work will be neater, with fewer runs and drips
- It won’t leave bristles in your finish
- It responds better to cleaning and storage
- It can be reused and will last longer
What are the characteristics of a high-quality brush?
- Long, silky, flexible bristles of varying lengths
- Bristles with “flagged” or split tips
- A non-corrosive metal or plastic ferrule
- Tapered, well-secured bristles
- Well-balanced feel
When selecting your brush, good quality is certainly important, however, you also need to keep in mind what type of project you plan to undertake: water-based or oil. Use ONLY brushes made with synthetic bristles for water-based stains and finishes. Natural-bristle brushes will soak up water causing the filaments to swell and become floppy. Oil-based products will apply smoothly and easily with a good-quality natural bristle brush.
Minwax® Wood Finishing Brushes
Minwax® offers high-quality natural and synthetic bristle brushes specifically designed for use with Minwax® wood finishing products:
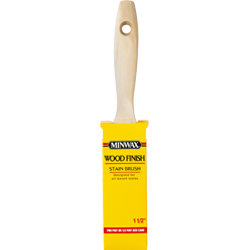
Minwax® Wood-Finish™ Stain Brush
A natural-bristle brush specifically designed for use with oil-based stains.
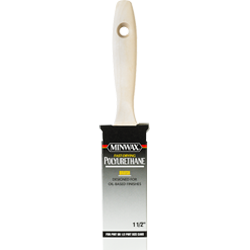
Minwax® Polyurethane Brush
A natural-bristle brush for use with oil-based clear protective finishes.
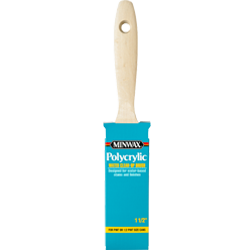
Minwax® Polycrylic™ Brush
A synthetic bristle brush specifically designed for application of water-based stains and clear protective finishes.
Surface Preparation
Don’t Forget to Sand
Sanding is one of the most important steps in wood finishing. A thorough sanding is often what separates acceptable results from beautiful results.
Start with a medium grade of sandpaper (e.g. #120) and gradually work your way to a finer grade (e.g. #220).
Sand in the direction of the grain for a smooth, uniform finish and remove all sanding dust using a vacuum, dry paintbrush or cloth.
Look out for dried glue, especially in the joint area. If it’s not thoroughly removed by sanding, it will interfere with the staining process.
End-grains (areas where the wood has been cut against the grain), such as the front side of a table, tend to soak up more stain than surfaces cut with the grain. With additional sanding to end-grain areas, you can better control the absorption of stain.
Sanding Tips:
- To sand between chair spindles, wrap a strip of sandpaper around the spindle and work it back and forth like dental floss.
- For bigger jobs, use a power sander, but first practice on a spare piece of wood.
- To check your work, run a sock over the sanded wood. If it snags, you’ll need to re-sand the area.
For more preparation tips and tricks, check out the basics of Proper Wood Preparation.
Choosing a Stain Color
What affects the wood’s color?
The final color result is determined by three main factors:
- The color of the stain selected
- The species of the wood and how porous it is
- How long the stain is left on
Choose from over one hundred stain colors, using the Minwax® Stains Color Guide or a sample wood chip board at your local Minwax® retailer.
Remember different species of wood absorb stain differently. Always test the color on a hidden section of the wood you are using.
Did you know that...
Minwax® stains can be mixed together to create custom tones.
- It’s easy to lighten any tone of Minwax® Wood Finish™ by adding Minwax® Wood Finish™ Natural.
- If you are matching existing wood, look at its predominant color. Is it reddish, grayish, blondish or yellowish? Use a stain with that hue as your base and add lesser amounts of a secondary stain until you reach the desired tint or tone.
- Do not mix more than three wood tones at a time. That way it is easier to control and replicate the outcome.
- Be sure to mix enough stain to complete the entire project.
You can use stains to give inexpensive wood an expensive-looking appearance. Use wood with a similar grain. For example:
- To stain a less-expensive wood to achieve a cherry appearance, use maple, which has a tight-grained pattern similar to cherry.
- Poplar is often used as a substitute for white oak.
Traditional System vs. One-Step Stain & Finish
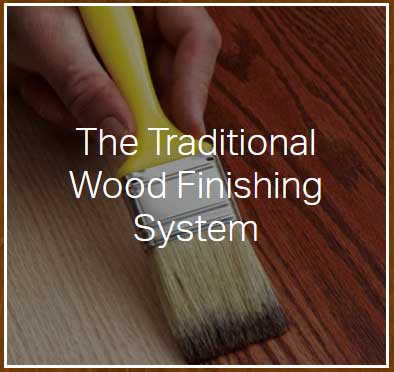
Introduction
The traditional wood finishing system consists of applying a wood stain and clear protective finish in individual steps. This method permits independent control over each step—the depth of color and the level of protection—and is used to obtain rich, professional-looking finishes on small and large projects.
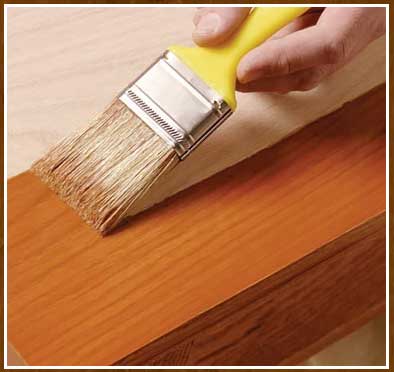
Apply Stain
Choose from Minwax® Wood Finish™, Minwax® Gel Stain, or Minwax® Water Based Wood Stain and apply according to label instructions. For expert application tips and specific advice for staining some of the more popular wood types, see the Guide to Staining Interior Wood.
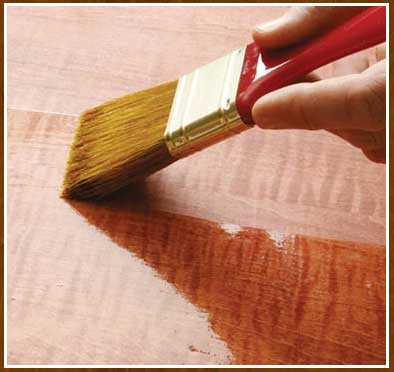
Apply Clear Protective Finish
The next step in the process is to apply a clear protective finish. This protects, preserves, and enhances the natural beauty of the wood. To select the best finish for your project, check out the Guide to Clear Finishes.
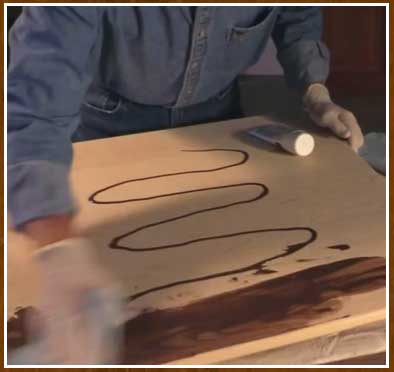
Using a One-Step Product
One-step products like Minwax® PolyShades®, Minwax® Express Color, and Minwax® Wood Finishing Cloths provide both color and protection at the same time. They can simplify the finishing process and reduce finishing time. One-step products are ideal for use on furniture and smaller pieces, such as decorative items.
1
2
3
4
of 4
Helpful Tips
Prevent wood swelling and warping:
To prevent wood swelling and warping due to changes in temperature and moisture, finish all of the exposed surfaces of the wood item. These include areas not easily visible, like the insides of cabinets and drawers and the undersides of tables.
When to apply the clear finish:
Allow the stain to dry the recommended amount of time before applying the first coat of a clear finish. Applying the protective finish before the stain has completely dried may result in chipping, peeling, or bleeding of color.
“Tip-off” each section:
When using a clear protective finish, “tip-off” each section. Hold the brush at a 45-degree angle and lightly run the bristles over the length of the finish to remove all evidence of brush strokes and break any bubbles that may have occurred.
When to apply additional coats of finish:
When applying additional coats of a protective finish, the bottom coat must be dry before recoating. Lightly sand between coats with 220-grit sandpaper to improve coat-to-coat adhesion and carefully remove all sanding dust before recoating. Failure to follow these steps may result in adhesion problems.
Properly seal and clean can:
If you have product left over, wipe the can rim so that the product doesn’t dry out and so that rust doesn’t form on the can. This will also help you seal the can properly. After sealing, store cans away from heat.
Cleaning your brushes:
Clean brushes soiled with oil-based finishes using mineral spirits. Soap and water are all that is needed for brushes used with water-based products.