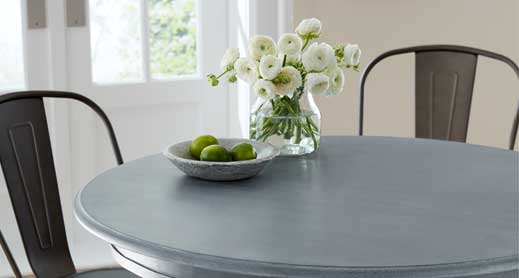
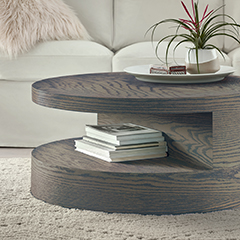
Store Locator
|
United States
Minwax Keep on Finishing™
Products How-To Get Inspired Woodworking Projects Blog Videos
Link to our Facebook page Link to our Instagram page Link to our Twitter page Link to our Pinterest page" Link to our Youtube channel
 Minwax
Keep on Finishing™
Link to our Facebook page Link to our Instagram page Link to our Twitter page Link to our Pinterest page Link to our YouTube channel
  • Products
    • Products Home Page
    • Minwax Stains Color Guide
    • Preparation
    • Stains
    • One-Step Stain & Finishes
    • Design Series
    • Clear Protective Finishes
    • Hardwood Floors
    • Maintenance & Repair
    • Specialty Finishes
    • Brushes
    • Product Finder
  • How To
    • How To Home
    • Wood Finishing Process
    • Wood Species
    • Proper Wood Preparation
    • Staining Interior Wood
    • Guide to Clear Finishes
    • FAQs
    • Top Ten Tips
    • Wood Finishing Articles
    • Wood Finishing Terms
    • Expert Tips
    • Polyshades® Color Transformation Guide
    • Wood Maintenance & Repair
  • Get Inspired
    • Get Inspired Home
    • For the Home
    • Furniture
    • Floors
    • DIY Project Gallery
    • Fan of the Month
    • Project Showcase
  • Woodworking Projects
    • Woodworking Projects Home
    • Accessories
    • Cabinets & Chests
    • Chairs & Benches
    • Desks
    • Media Organizers
    • Shelving
    • Tables
    • Toys (for kids)
    • Beginner
    • Intermediate
    • Advanced
    • Project Links
  • Videos
    • Videos Home
    • New & Featured
    • Application & How-To
    • Project Ideas
    • Hardwood Floors
    • Restore, Refinish, Repair
  • Accessibility Statement
  • Blog
  • About Us
  • Contact Us
  • Where to Buy
  • Site Map
  • Privacy Policy
  • Do Not Sell My Personal Information
  • Terms of Use
  • CA Supply Chains Act
  • Helpful Links

Staining Interior Wood

Basic tips and advice on choosing and using wood stains.
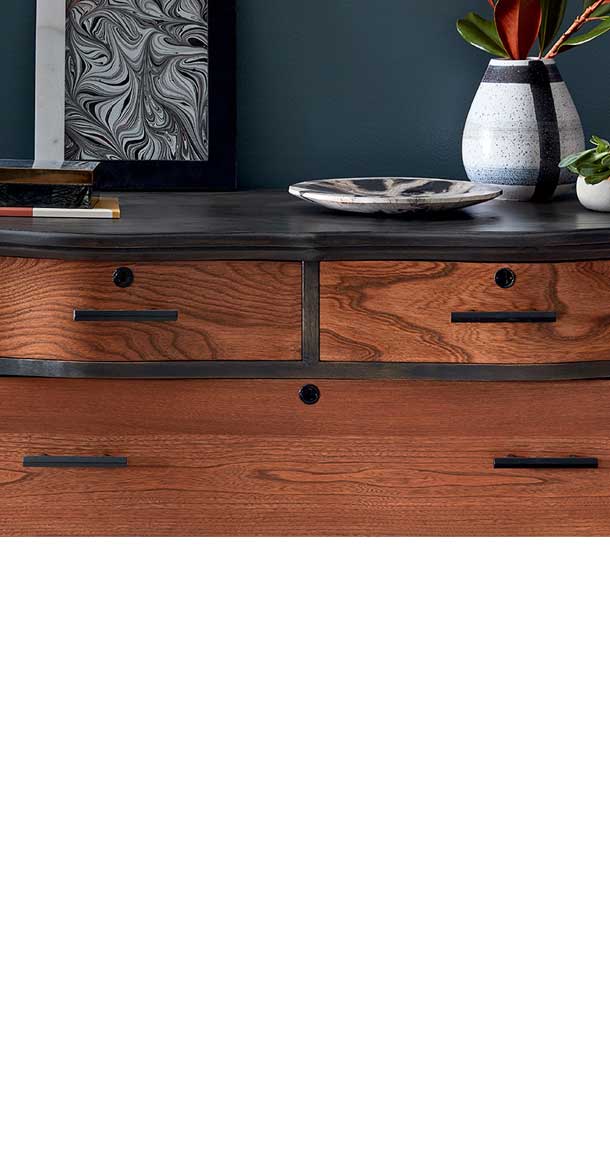
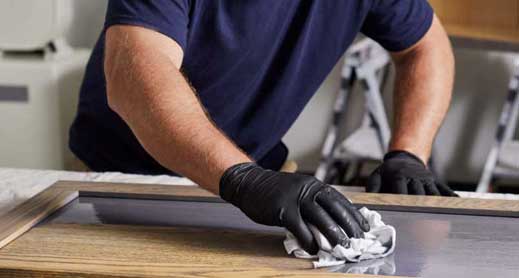
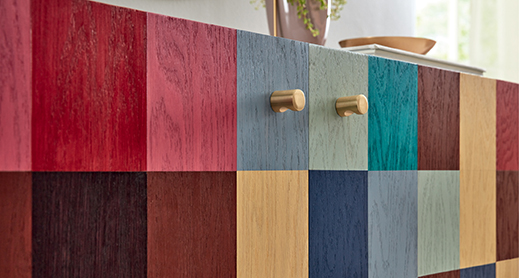
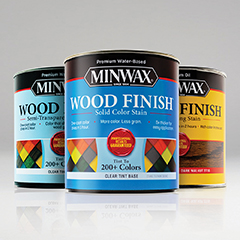
Home \ How-to \ Staining Interior Wood
Tweet

Click on any of the topics below, scroll, or use the arrows to the right to navigate through the how-to steps and tips from Minwax®.

  • Introduction
  • Oil or Water?
  • Stains Comparison Chart
  • Application Tips
  • Staining Popular Woods
  • Wood Staining Do’s and Don’ts

Stain Adds Beautiful Color

While wood in its natural state can provide breathtaking beauty, it doesn't always match the other colors or wood tones in our home. Adding stain to bare or stripped wood can both change the color and highlight the grain pattern of any interior wood.

Since wood is a product of nature, it can vary from tree to tree, even in the same wood species. Avoid surprises: first test any stain you are considering on an inconspicuous spot to ensure that the color of the stain—in conjunction with the natural color of the wood - produces the color you desire.


Choosing a Wood Stain

Minwax® stains are available in two formats: water or oil-based. Use the guidelines below to help decide whether to use an oil-based or water-based stain on your next project:

Oil-Based Stains

  • Give you a longer working time, enabling you to stain floors, cabinets, paneling and doors without the worry of dried lap marks.
  • Do not raise the grain, eliminating the need for additional sanding.

Water-Based Stains

  • Are lower in odor than oil-based stains.
  • Dry faster, enabling you to stain and finish in one day.
  • Require only soap and water for clean-up.
  • Come in a wider range of vibrant stain colors.

Minwax® Stains

Wood Finish™

Oil-based penetrating stain, available in 29 colors.

  Learn More

Gel Stain

Unique, non-drip oil-based formula that is ideal for vertical surfaces; can be used on both wood and non-wood surfaces.

  Learn More

Water Based Wood Stain

Fast-drying, available in 40 beautiful custom colors, soap and water clean-up.

  Learn More

Minwax® Stains Comparison Chart

Use the chart below as a guide to selecting your stain. Click on any product for more details.
Product Ideal For
Use On
Application Tools Recommended Preparation Number Of Coats Time To Recoat Dry Time Recommended Clear Protective Finish Colors
Wood Finish Wood Finish™ Wood furniture, woodwork, cabinets, doors, trim, molding and hardwood floors Natural bristle brush, foam applicator, cloth Minwax® Pre-Stain Wood Conditioner (oil-based) 1 coat. To darken the color, apply a second coat after 2-4 hours (time dependent on color). 2-4 hours depending on color 2-4 hours depending on color Minwax® Fast-Drying Polyurethane, Minwax® Helmsman® Spar Urethane. For a water-based finish use Minwax® Polycrylic™ Protective Finish. 29 wood tones - click link below to see colors.
Minwax® Wood Finish Water-Based Semi-Transparent Color Stain product image Minwax® Wood Finish Water-Based Semi-Transparent Color Stain Ideal for small projects, unfinished furniture, cabinets, doors and trim. Not for use on floors. Clean rag or synthetic brush Minwax® Water Based Pre-Stain Wood Conditioner One Coat color. To intensify color, a second coat may be added. 1-2 hrs to intensify color 1 hour Minwax® Polycrylic™ Protective Finish. Tintable to 200+ Colors
Minwax® Wood Finish Water-Based Solid Color Stain product image Minwax® Wood Finish Water-Based Solid Color Stain Ideal for small projects, unfinished furniture, cabinets, doors and trim. Not for use on floors. Synthetic brush Minwax® Water Based Pre-Stain Wood Conditioner One Coat color. To intensify color, a second coat may be added. 1-2 hrs to intensify color 1 hour Minwax® Polycrylic™ Protective Finish. Tintable to 200+ Colors
Gel Stain Gel Stain Woodwork, doors, cabinets, furniture, molding, trim, accessories and non-wood surfaces such as metal, veneer and fiberglass - not recommended for floors Natural bristle brush, foam applicator, cloth Minwax® Pre-Stain Wood Conditioner (oil-based) 1-2 coats depending on the surface. 8-10 hrs 24 hours Minwax® Fast-Drying Polyurethane and Minwax® Helmsman® Spar Urethane. 12 wood tones - click link below to see colors.
Polyshades Polyshades® Wood furniture, doors, woodwork, cabinets, accessories - not recommended for floors Natural bristle brush Minwax® Pre-Stain Wood Conditioner (oil-based) 2 coats. To deepen the color, apply a third coat. after 6 hrs 6 hours Optional, for additional luster or sheen a clear protective finish can be applied. Recommended finishes include Minwax® Fast-Drying Polyurethane or Minwax® Wipe-On Poly. 14 wood tones - click link below to see colors.
Water Based WoodSheen Water Based WoodSheen® Wood furniture, doors, woodwork, cabinets, accessories Cloth Optional, to help ensure uniform acceptance of the stain and finish, use Minwax® Water Based Pre-Stain Wood Conditioner 1 coat. For a deeper color and sheen, wait one hour and apply a second coat. after 1 hr After 1 hour, the surface is dry to the touch. Wait overnight before subjecting the wood to normal use. Optional, for additional luster or sheen a clear protective finish can be applied. Recommended finishes include Minwax® Wipe-On Poly or Minwax® Water Based Wipe-On Poly. 6 wood tones - click link below to see colors.
Express Color Express Color™ Wood furniture, woodwork, cabinets, accessories Soft cloth Optional, to help ensure uniform acceptance of the stain and finish, use Minwax® Water Based Pre-Stain Wood Conditioner 1 coat. For a deeper color and sheen, wait one hour and apply a second coat. after 1 hr After 1 hour, the surface is dry to the touch. Wait overnight before subjecting the wood to normal use. Optional, for additional luster or sheen a clear protective finish can be applied. Recommended finishes include Minwax® Wipe-On Poly or Minwax® Water Based Wipe-On Poly. 4 wood tones, 4 decorative colors - click link below to see colors.
Wood Finishing Cloths Wood Finishing Cloths Wood furniture, woodwork, cabinets, accessories n/a Optional, to help ensure uniform acceptance of the stain and finish, use Minwax® Water Based Pre-Stain Wood Conditioner 1 coat. For a deeper color and sheen, wait one hour and apply a second coat. after 1 hr After 1 hour, the surface is dry to the touch. Wait overnight before subjecting the wood to normal use. Optional, for additional luster or sheen a clear protective finish can be applied. Recommended finishes include Minwax® Wipe-On Poly or Minwax® Water Based Wipe-On Poly. 5 wood tones - click link below to see colors.

Application Tips

All stains require open pores for adequate absorption into the wood.

Applying stain over a finished surface will not change the color of the wood. Your cloth will simply wipe off the stain blocked from the pores by the existing finish.

Sand bare wood lightly

To open the pores in preparation for staining. Begin with a medium-grit sandpaper (#120). Work your way to a final sanding with a fine-grit sandpaper (#220). Always sand in the direction of the grain to avoid leaving unsightly scratches.

Stain can be applied with a bristle brush, a foam brush, or a cloth.

On woods with large, open pores, such as oak, mahogany and ash, increase your pressure to work the stain into the pores. Rubbing or brushing against the direction of the grain will help fill deep pores with stain. Apply a liberal amount of stain, giving the wood an ample amount to absorb.

Brush applying stain to an unfinished table

Pay attention to how long you leave the stain on the wood before wiping off any unabsorbed liquid.

The longer the stain is left on, the deeper and richer the color will be. For consistent color, use careful timing. Never allow any stain to dry on the wood surface—it will prevent the clear finish from adhering and cause other issues.

Remove the last of any unabsorbed stain with a dry cloth, wiping in the direction of the wood grain.

Swirl marks left by a stain-saturated cloth will become even more obvious under a coat of clear finish.

When staining vertical surfaces, such as unfinished paneling or doors, try Minwax® Gel Stain.

Its thicker consistency enables it to cling to vertical surfaces without immediately running, giving you more time to apply an even coat of stain.

Remember: a stain provides color, but not protection.

Once the stain has dried, apply a clear finish to protect both the stain and the wood—and to make the final results look even more beautiful.


Staining Popular Woods

Wood Species

Oak

Oak

Always a popular hardwood, oak has a strong grain pattern and large, open pores that absorb stain readily. For that reason, oak is attractive with nearly any color of stain. It does not tend to turn blotchy, but like all woods it will stain more evenly after an application of a pre-stain wood conditioner.

To ensure that any stain penetrates and fills oak’s deep pores, apply a liberal amount of stain to the wood, then work it into the pores using a cloth in a swirling motion. Afterwards remove any unabsorbed stain by rubbing a clean cloth in the direction of the grain.

Wood Species

Alder and Aspen

Alder and Aspen

These two hardwoods have become the darlings of the unfinished furniture industry because they’re lightweight, affordable and easy to machine. Unfortunately, they absorb stains unevenly. To help reduce blotchiness when staining, first apply a liberal coat of a pre-stain wood conditioner.

Wood Species

Ash and Chesnut

Ash and Chesnut

These hardwoods share many of the characteristics of oak and should be stained in the same manner described above for oak.

Wood Species

Birch

Birch

Less expensive than hard maple, birch is often substituted for maple in furniture and kitchen cabinets. But, like hard maple, birch wood does not absorb stain evenly and should not be stained with dark colored stains. When staining, first apply a pre-stain wood conditioner, then select stains lighter in color.

Wood Species

Cherry

Cherry

The distinctive reddish hue of cherry reduces the need to stain this popular hardwood. Unlike oak and ash, cherry has a subtle grain pattern and small pores which do not absorb as much stain. This makes it difficult to make significant changes to its natural color. The whitish sapwood (new growth close to the tree’s bark) often found along the edges of cherry boards can be stained using Minwax® Wood Finish™ to blend with the reddish, mature heartwood.

Wood Species

Mahogany

Mahogany (also Rosewood and IPE)

These South American hardwoods are noted for their dark, rich colors and their high levels of natural oils. In most instances, additional staining is not necessary. When it is, always use an oil-based stain, such as Minwax® Wood Finish™ or Minwax® Gel Stain, to ensure compatibility with the natural oils in these woods.

Wood Species

Hard Maple

Hard Maple

As its name implies, hard maple is an extremely dense, tight-pored wood that does not absorb much stain. Unlike oak and ash, the grain pattern of maple is uneven, causing it to absorb stains in varying degrees. To reduce any blotchiness, first apply a coat of a pre-stain wood conditioner. Even then, it is advisable to only stain maple with light to medium colored stains.

Wood Species

Pine

Pine (also Fraser and Cedar)

These three popular softwoods look beautiful when finished naturally or with only a light application of stain. Problems arise, however, under darker stains, for all three absorb stain unevenly, especially around knots and blemishes. Always apply a liberal coat of a pre-stain wood conditioner prior to staining and even then select light to medium colors. These woods also are less likely to exhibit blotchiness if stained and finished with Minwax® PolyShades® or Minwax® Gel Stain.

Wood Species

Poplar

Poplar

Often called “poor man’s cherry,” poplar has a grain pattern similar to prized cherry, but lacks the same reddish hue. When stained with Minwax® Wood Finish™ Cherry, Red Mahogany or other colors containing red dyes and pigments, less expensive poplar can be made to look very much like cherry.

 

Wood Staining Do’s and Don’ts

Do...

Always prepare the wood with a light sanding.

Apply Minwax® Pre-Stain Wood Conditioner to ensure an even stain color (see Wood Preparation for other tips).

Stir the can thoroughly.

Stir the can thoroughly to evenly redistribute any color pigments that may have settled to the bottom.

Test any stain you are considering.

Test any stain you are considering on an inconspicuous spot to ensure that the color of the stain—in conjunction with the natural color of the wood—produces the color you desire.

Apply a second coat.

If you want a darker, richer tone, apply a second coat according to label directions.

Don’t...

Leave hinges, handles, knobs or pulls on a piece.

Remove hinges, handles, knobs or pulls before you start staining or finishing. Wood finishing products may change the color of any metal hardware.

Attempt to obtain a darker color by allowing any unabsorbed stain to dry on top of the wood.

This will later peel off. Stains are formulated to dry in the wood, not on the wood.

Apply a clear protective finish before the stain has dried completely.

The solvent in the finish will activate the damp stain, allowing your brush or cloth to pull the stain out of the pores of the wood.

How-To

Guide to Clear Finishes

Find out how to select and use clear protective finishes

 Learn How To
 Top


Minwax
About Us Contact Us Where to Buy
Minwax

Keep on Finishing™

Newsletter Sign Up

Get inspired, share projects and learn more.

Facebook Twitter YouTube Pinterest Instagram
Accessibility Statement Site Map Privacy Policy Do Not Sell My Personal Information Terms of Use CA Supply Chains Act Helpful Links Press Room
© 2021 Minwax® Company.

  • Minwax Stains Color Guide
  • Preparation
  • Stains
  • One-Step Stain & Finishes
  • Design Series
  • Clear Protective Finishes
  • Hardwood Floors
  • Maintenance & Repair
  • Specialty Finishes
  • Brushes
  • Product Finder

Minwax®
Stains Color Guide

Minwax® helps you select the ideal stain color for your wood project.

View Minwax® Stains Color Guide

Minwax®
Preparation

The better the wood preparation, the better the final result. Minwax® preparation products are the first step to ensure your wood surfaces show their most beautiful colors and smoothest finishes.

View all Preparation products

Minwax® Pre-Stain Wood Conditioner
Minwax® Water Based Pre-Stain Wood Conditioner
Minwax® Stainable Wood Filler
Minwax® Antique Furniture Refinisher
Minwax® Performance Series Sanding Sealer
Minwax® Color Changing Wood Filler


Minwax®
Stains

The products that have made Minwax® an American icon will add color and beauty to your wood—in oil or water-based stains. With Minwax® wood stains, there’s a color to suit every style.

View all Stains

Minwax® Wood Finish™
Minwax® Wood Finish
Water-Based Solid Color Stain
Minwax® Wood Finish
Water-Based Semi-Transparent Color Stain
Minwax® Gel Stain


Minwax®
One-Step Stain & Finishes

Looking for speed and convenience? Turn to Minwax® to add rich color and durable protection to your wood project in a single step.

View all One-Step Stain & Finishes

Minwax® Polyshades®
Minwax® Express Color™ Wiping Stain & Finish
Minwax® Wood Finishing Cloths


Minwax®
Design Series

Minwax Design Series washes, wood effects and waxes offer new options for bare wood and wood that's already stained. Combine the Minwax Design Series with other Minwax stains to produce on-trend looks, finishes and special effects.

View all Design Series products

Minwax® Color Wash
Minwax® Wood Effects
Minwax® Grain Highlighting Finishing Wax
Minwax® Soft Touch Finishing Wax


Minwax®
Clear Protective Finishes

From furniture to floors, trust Minwax® products that beautify and protect wood. For superior durability and long-lasting beauty, the choice is clear — protective clear finishes from Minwax!

View all Clear Protective Finishes
Interior Interior/Exterior Wipe-Ons Lacquer

Minwax®
Hardwood Floors

Whether you are installing a new hardwood floor, refinishing an old one, or just keeping your existing floor looking as good as new, Minwax® has a full range of products to make and keep your floors beautiful.

View all Hardwood Floor products

Minwax® Super Fast-Drying Polyurethane for Floors
Minwax® Ultra Fast-Drying Polyurethane For Floors
Minwax® Ultimate Floor Finish
Minwax® Professional Formula Sanding Sealer
Minwax® Complete 1-Step Floor Finish
Minwax® Hardwood Floor Reviver
Minwax® Hardwood Floor Cleaner


Minwax®
Maintenance and Repair

Minwax® offers a variety of easy-to-use products to help clean and repair wood that is chipped, cracked, scratched, even decayed, to its original beauty.

View all Maintenance & Repair products

Minwax® Wood Cabinet Cleaner
Minwax® Wood Finish™ Stain Marker
Minwax® Color-Matched Wood Filler
Minwax® Blend-Fil® Pencil
Minwax® Wood Putty®
Minwax® High Performance Wood Filler
Minwax® High Performance Wood Hardener


Minwax®
Specialty Finishes

Finishes that offer protection for wood with a soft luster.

View all Specialty Finishes

Minwax® Grain Highlighting Finishing Wax
Minwax® Soft Touch Finishing Wax
Minwax® Paste
Finishing Wax
Minwax® Tung Oil Finish


Minwax®
Wood Finishing Brushes

Natural and synthetic bristle brushes specifically designed for use with Minwax® wood finishing products. Available sizes: 1½", 2", 2½".

View all Wood Finishing Brushes

Minwax®
Product Finder

Answer simple questions about your project to get product recommendations.

Find the right products for your project
Wood Finishing Process
  • Before you Begin
  • Wood Species
3 Easy Steps to a Beautiful Finish
  • Proper Wood Preparation
  • Staining Interior Wood
  • Guide to Clear Finishes
 How-To
See all tips, step-by-step instructions, and helpful Dos and Dont’s
Tips and Techniques
  • FAQs
  • Top Ten Tips
  • Wood Finishing Articles
  • Wood Finishing Terms
  • Expert Tips
More How-To Tips & Instructions
  • Polyshades®
    Color Transformation Guide
  • Wood Maintenance & Repair
Minwax® Inspiration
  • For the Home
  • Furniture
  • Floors
Minwax® Community
  • DIY Project Gallery
  • Fan of the Month
  • Project Showcase
 Get Inspired Take hold of inspiration. Discover exciting project ideas for your home.
  • Accessories
  • Cabinets & Chests
  • Chairs & Benches
  • Desks
  • Media Organizers
  • Shelving
  • Tables
  • Toys
  • Project Links
  • New & Featured
  • Application & How-To
  • Project Ideas
  • Hardwood Floors
  • Restore, Refinish, Repair