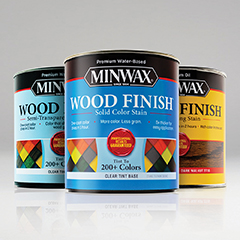
We all wish that every piece of wood in our home could stay as fresh and beautiful as the day it was first finished, but that simply isn't possible. Each day the wood around us, from floors and woodwork to furniture and fine antiques, is subjected to sunlight, grit, dust, moisture and dry air. Fortunately, all it takes is a few minutes–plus the right Minwax® products–to both roll back time and protect your wood for years to come
Before starting, keep in mind that not all clear protective finishes are alike. They have different chemical components that aren't always compatible with one another. For example, no finish will adhere to paste wax. If you suspect a piece you are about to restore has been waxed, remove the wax with a soft cloth dipped in mineral spirits.
The three finishes you are most likely to encounter–shellac, lacquer and polyurethane–can be identified by simple tests on an inconspicuous spot on the piece. If a cotton ball dipped in denatured alcohol softens the finish, it is shellac. If lacquer thinner softens the finish, it is lacquer. If neither solvent affects the finish, it is polyurethane.
One other piece of advice: Before applying a fresh coat of finish over an existing one, test their compatibility on a small, hidden spot, such as the inside of a cabinet door. If the new finish dries, hardens and adheres to the old one, it's safe to topcoat the rest of the piece.
Antiques
Whether it’s a 100-year-old picture frame or your grandfather's tool chest, antiques deserve special attention. Many are plagued by loose joints and dried-out wood, but you must always take great care to preserve and protect their valuable original finishes. Antiques should only be stripped if paint has been applied over the original clear finish and they should never be dipped in a vat of stripper.
For antiques with original finishes intact, carefully clean off any dirt and grime with a soft cloth moistened with mineral spirits, then make any color touchups with Minwax® Wood Finish™ Stain Markers, which come in a variety of Wood Finish™ colors. The most appropriate protective finish recommended by museum curators and collectors is a durable wax such as Minwax® Paste Finishing Wax, which can be hand-buffed to a handsome protective sheen.
Cabinets
Whether they're in the kitchen or bathroom, excessive moisture and cooking oils can take their toll on cabinet finishes if we don't lend a hand. Keep a trigger-spray bottle of Minwax® Wood Cabinet Cleaner beneath every sink in the house and use it whenever you detect water spots or grease build-up on the cabinets.
Excessive moisture, such as what we find around the dishwasher or sink, can eventually weaken even the strongest of finishes. If the finish around your dishwasher is polyurethane and if it has turned white or is starting to disappear, the solution is easy. Dip a piece of 320-grit or finer sandpaper in a shallow bowl of Minwax® Wipe-On Poly, then gently sand the damaged area. The key to this wet-sanding technique is keeping your sandpaper loaded with Wipe-On Poly so it won't leave scratches. Allow the Wipe-On Poly to penetrate for about five minutes before removing any excess with a clean, lint-free cloth.
Floors
The grit we track in with the soles of our shoes acts just like sandpaper, gradually wearing away the floor finish. Strategically placed doormats and throw rugs will help, but regular vacuuming and cleaning with Minwax® Hardwood Floor Cleaner will remove the grit before it harms the surface. Hardwood Floor Cleaner will also remove stubborn dirt and grease without leaving any residue.
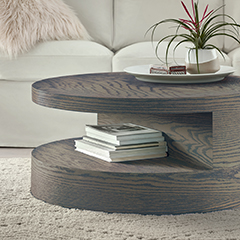
Furniture
Nearly all wood furniture has a layer of stain that's protected by two or more coats of a clear protective finish. Over time, normal wear and tear can leave nicks and scratches in both the stain and the finish, but the fix is easy with Minwax® Wood Finish™ Stain Markers. Available in eight popular colors, their precision felt tips give you a quick and easy way to touch up minor blemishes without resorting to costly refinishing.
For deeper scratches that need filling, reach for a Minwax® Blend-Fil® Pencil. Also available in eight popular colors, a Blend-Fil® Pencil fills scratches and holes while at the same time restoring the wood's original color.
Gouges and Holes
Unfinished furniture and woodwork with defects, such as splits, gouges and screw holes, require a filler that is easily sanded and stainable. Minwax® Stainable Wood Filler passes both tests with flying colors. Available in convenient squeeze tubes and 16-ounce containers, Stainable Wood Filler hardens as it dries, enabling you to sand it level with the surrounding wood. Just as important, after sanding it will accept all Minwax® penetrating stains and can be finished with any Minwax® protective topcoat.
Nail Holes
Whether they're in furniture or trim work, open nail holes are just plain unsightly, but closing them up is easy with Minwax® Wood Putty, a premixed material color-matched to the most popular Minwax® Wood Finish™ colors. Simply press a small amount of it into the hole, wipe off the excess with a soft cloth, and you're done.
Rotting Wood
Water is wood's enemy. Given enough time, water will soften and eventually cause decay in even the toughest hardwoods. Periodically check your window sills, doors and door jams, along with any wood in contact with masonry. If you discover any softened wood, use a screwdriver to carefully remove the rotted wood fibers. Allow the area to dry (a fan or hair drier speeds the process), then brush on a liberal coat of Minwax® Wood Hardener. Allow it to penetrate, dry and harden inside the wood fibers, then fill the cavity with Minwax® High-Performance Wood Filler.
Interior Window Sills
Window sills inside the house have a tough job: They have to look as good as interior trim, but they have to act like exterior trim, withstanding the effects of sunlight and moisture. If your existing urethane finish needs extra protection but not a total refinishing, you can re-coat it with Minwax® Helmsman® Spar Urethane, provided you follow the three rules for re-coating: clean, dry and scuff. First, clean off any wax and dirt with a cloth dipped in mineral spirits. Second, let the wood dry completely. Then, lightly scuff the surface with 220-grit sandpaper or a synthetic sanding pad. Following these three steps will ensure that the Helmsman® you apply will adhere to and protect both the old finish and the underlying wood.
Wherever some of the old finish has disappeared and the wood has become water-stained, start by sanding off whatever remains of the old finish with 120-grit sandpaper. Then apply the Minwax® stain that best matches the surrounding trim. Finally, protect both stain and wood with two coats of Minwax® Helmsman® Spar Urethane.